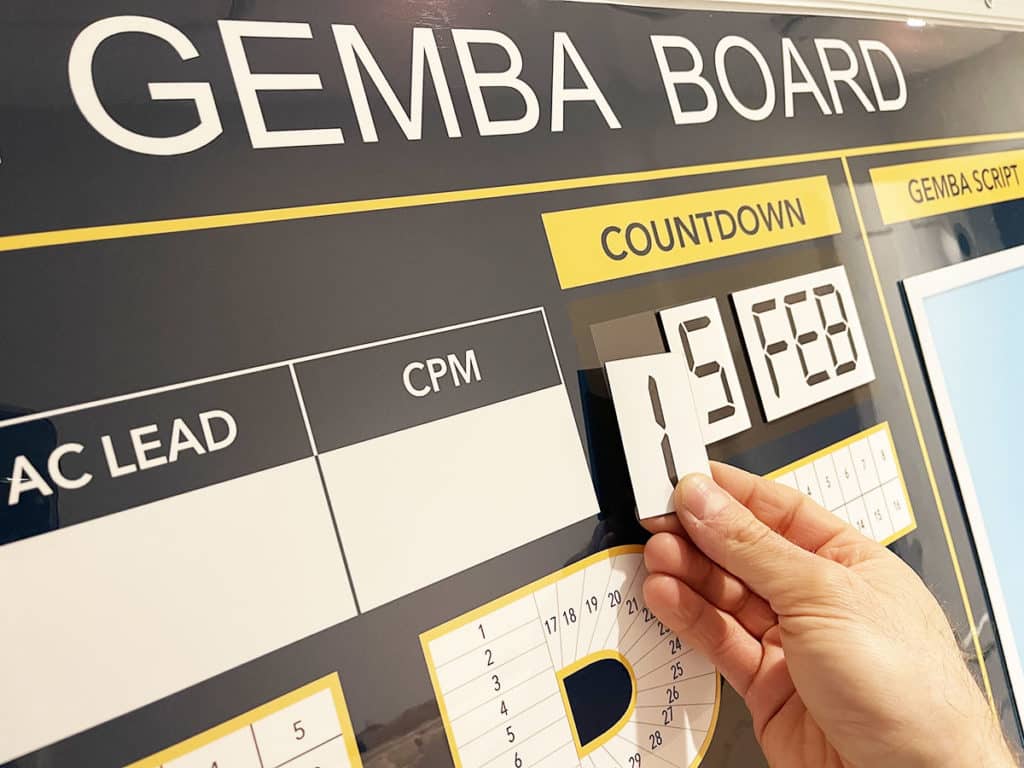
To make a Gemba Board, take these steps…
Firstly, decide where to put your Gemba Board. Above all, remember that Gemba means “the actual place”. Therefore, locate your board somewhere easily visible near your process. If a wall mounted board in unworkable then consider a mobile board instead.
Secondly, establish what you want to appraise and assess. For example, key targets. Likewise, relevant milestones on your Continuous Improvement journey.
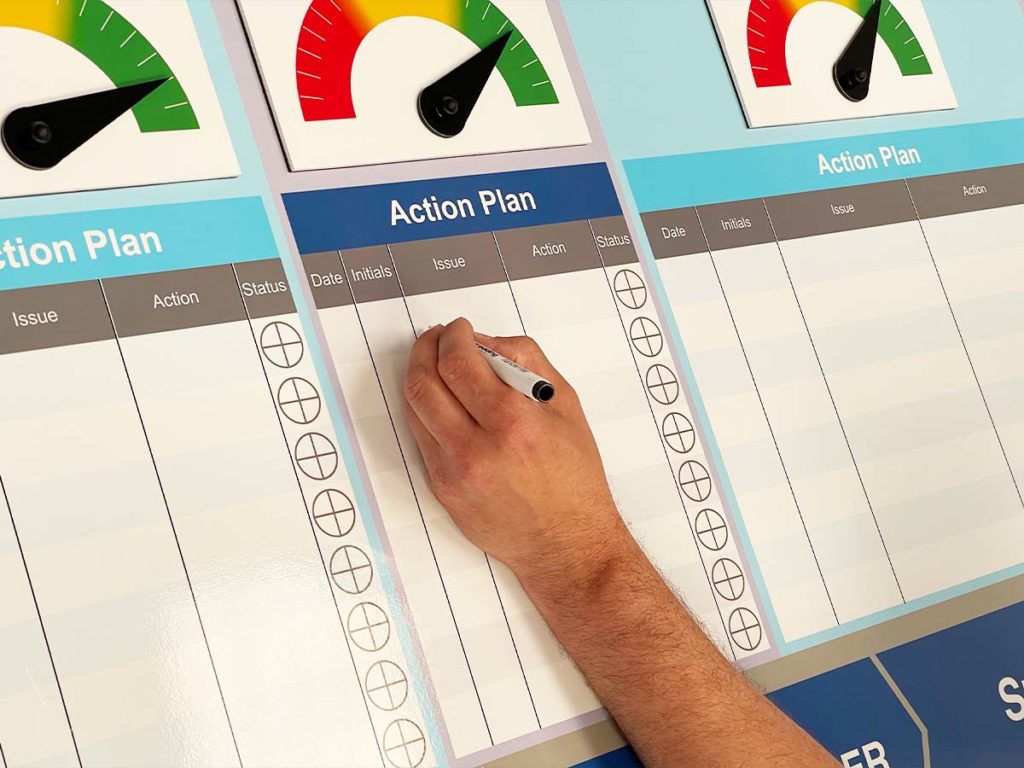
Next, define clear sections on your Gemba Board. Each relates to an element or metric that you want to monitor. Above all, show when and how to take action for each.
Subsequently, think ‘at-a-glance’. In other words, use visual controls and status indicators to make status of a key element instantly visible. Likewise, make obvious when to take action.
Further considerations: use colour coding and visual calls to action. In other words, make your Gemba board intuitive and easy to comprehend. In addition, keep information succinct to support team focus. Finally, relate when to and how to take action.
Finally, make it easy to update. As a result, see information in real time. Therefore, reflect your process or project as it is operating right now.
How to make a Gemba Board – in brief
- Decide where to put your Gemba board (close to the process)
- Establish key targets and milestones to assess
- Make sections for key metrics to monitor
- Use visual controls and status indicators for instant visibility
- Consider colour coding and visual calls to action
- Finally, make a Gemba board that is easy to update
Gemba Boards – further ideas
See further examples in our Gemba Board Gallery
Update your Gemba board in real time
Define when and how to take action
Make clear sections on your board and use status indicators for at-a-glance visual cues
Further examples


SQCLEA board

SQDIPT board with status accessories

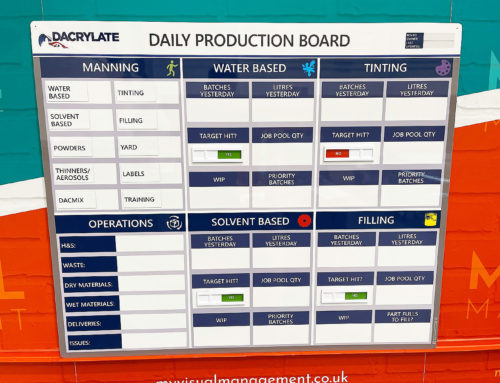
SQWP Production board

SQCDP Performance Board

SQDIP manufacturing board

SQDCIP Operations board

Tracking manufacturing performance

Operational Review SQD board

SQCDPI Board

SQCD board

Gemba Performance board

SQDCIP Operations board

Management KPIs for SQDPCP

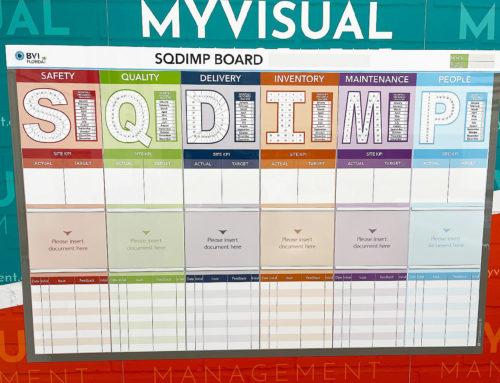
SQDIMP Tracker board

Modular SQD board

SQCDP Performance board

SQCD board with document holders

SQDP board

SQDC magnetic tiles with status counters

QCDP Performance board

Add status sliders to your SQD board

Performance SQCP board

Supply Chain Weekly Board

Daily Management Board

KPI board with status meters
SQDIMP Tracker board

Performance SQCP board

Customer Services Improvement board

Daily KPI board

Engineering and Quality tracking

SQDCP board

SQDE tracking board

Metric tracking, triple shift

SQPD board

5S & Safety tracking

SQDCP Meeting board

Choose which metrics to track

SIOIA Board

SQCDP Performance Information

SQDCP board

SQDCP meeting board

SQCDP Performance Information

Performance SQCDP board

Show delivery tracking and status

SQCDP board

SQPD visual management

Operations KPI board

Magnetic tiles for flexibility

SQCDP5S board with status tracking

Foundry SQD board

SQDIP for manufacturing

SQDIP Board

SQDIP Board with status sliders

SQKPM board

SQDC magnetic headings

Operations for air travel

Performance obeya

Performance obeya set up

SQDIP board

Custom printed status sliders for SQDIP

Show status with sliders

SQDIP

SQCDPE Performance board

Track your Quality targets

People and Delivery metric tracking

Gemba for retail

SQDIP magnetic tiles

SQDC magnetic tiles

SQACP tracking

Triple shift metrics

HSEQ Performance

SQPIW daily direction setting

SQDIP board

SQCDI Performance board

SQCDP board with document holders

Site scorecard for SQDCP

SQCDE mobile board

Gemba board for air travel

Choose a safety cross

Combine status sliders with dry wipe

Add a graph to chart progress

Utilise colour with SQDP

Make Continuous Improvement visual

Add status meters tracking progress

Track all operations with SQDIPE

SQDIP board with status sliders

Include Environment in SQDC status

Add status sliders to show progress

Track progress with dry wipe status

SQD/5S with magnetic status faces

Document holders keep information safe

Use dry wipe for instant updates

Magnetic labels for your SQD board

Status indicators provide visual updates

Add magnetic status labels

Magnetic status indicator

Set goals. Likewise, update them easily

Safety cross on SQDP board

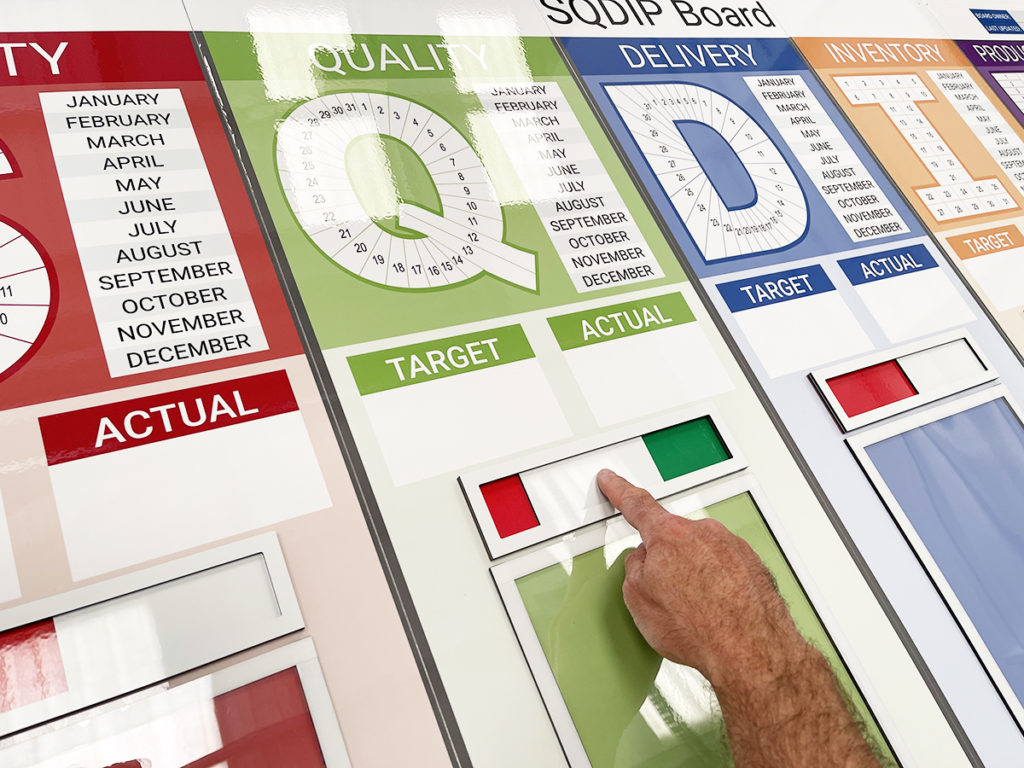
Status indicator meter for Quality
Our Approach
We create visual management boards everyday. As a result we have plenty of experience. We work for organisations in food production, the power industry, national rail, pharmaceuticals, education, healthcare, packaging and distribution.
Our team works with a simple idea or sketch and creates a professionally designed layout. This is then turned into a highly functional visual management board.
We offer customised options because we want to create the perfect board for you. So, here are a few examples. We can add magnetic areas or a dry-wipe finish (for use with whiteboard pens). Furthermore, you can choose Red/Green sliders or R.A.G. (Red, Amber, Green) status dials so you can quickly and visually update your board. These are just a few examples of the ways in which our boards can be tailored to meet your needs. You may also be interested in whiteboard overlays that can be used on top of an existing magnetic board.